
Clay tile roofs are a timeless and durable roofing option that combines long-lasting protection with aesthetic appeal. Installing clay tiles requires careful planning and attention to detail to ensure structural integrity, proper drainage, and overall performance. These roofs are heavier than asphalt or metal, so evaluating the roof structure is essential before installation. Clay tiles come in a variety of profiles, including Spanish S-tiles, flat tiles, and barrel tiles, offering homeowners design flexibility to complement their home’s style.
Proper installation enhances water shedding, minimizes maintenance, and reduces the risk of leaks or damage. While clay tiles are durable, they require the right underlayment, flashing, and attention to roof valleys and edges to ensure longevity. When installed correctly, a clay tile roof can provide decades of protection, resist severe weather, and boost the visual appeal of any home.
Preparing the Roof
Before installing clay tiles, the roof structure must be carefully assessed to ensure it can support the additional weight. Reinforcements may be needed to prevent sagging or structural failure. Once verified, the underlayment is installed to provide a waterproof barrier beneath the tiles. Proper flashing at valleys, edges, and chimneys ensures that water does not infiltrate vulnerable areas. Choosing the right clay tiles for your roof is equally important. Different profiles, such as Spanish S-tiles, flat tiles, or barrel tiles, offer unique aesthetics and functional benefits, while color selection enhances overall curb appeal.
Compliance with local building codes and permit requirements is essential to ensure safety, avoid delays, and meet legal standards. Professionals typically handle permits and inspections, ensuring that the installation process follows all regulations and industry best practices. With careful preparation, the roof will be ready to receive tiles that provide both beauty and long-lasting protection.
Roof Structure Assessment
Clay tiles are heavy, so verifying structural integrity is critical. Additional reinforcement may be required to support the weight, prevent sagging, and maintain long-term durability. Proper assessment ensures safety and stability, allowing the roof to handle both the tiles and environmental stresses without compromising performance.
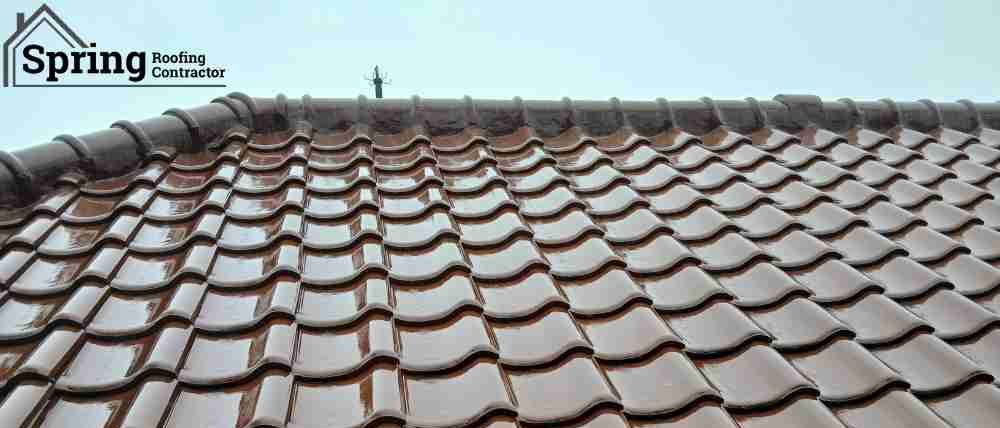
Choosing the Right Clay Tiles
Clay tiles come in multiple profiles, including Spanish S-tiles, flat, and barrel styles. Each offers distinct aesthetics and functional benefits, such as water shedding and durability. Choosing the right tile type and color enhances visual appeal while ensuring compatibility with roof design and optimal performance in varying weather conditions.
Building Codes and Permits
Following local building codes is essential for safe, compliant installation. Professionals handle permits, inspections, and adherence to regulations, ensuring structural safety, legal compliance, and long-term performance. Proper oversight prevents potential issues and guarantees that the clay tile roof meets standards while providing durability and protection.
Handling Common Issues
Clay tile roofs require occasional attention to maintain performance. Common issues include cracked or broken tiles, moss and algae growth, tile slippage, and underlayment deterioration. Prompt replacement of damaged tiles prevents leaks and further damage, with professionals installing matching replacements to maintain aesthetics and functionality. Moss and algae can retain moisture, increasing rot risks. Eco-friendly cleaning methods and low-pressure washing remove growth safely, while copper or zinc strips along the ridge prevent recurrence. Tile slippage may occur if fasteners or battens loosen.
Repositioning and refastening displaced tiles restores stability, and replacing damaged battens provides long-term support. Underlayment deterioration can compromise waterproofing. Replacing old underlayment while reusing intact tiles is cost-effective, restoring protection without removing all tiles. Regular roof inspections help detect these issues early, ensuring timely interventions and prolonging roof life. Addressing problems promptly protects structural integrity, reduces repair costs, and maintains both functionality and visual appeal of a clay tile roof.
Installation Steps
Installing clay tiles begins with preparing a clean, reinforced roof deck. Install the underlayment evenly and secure flashing along valleys and edges. Lay starter courses along eaves to ensure proper alignment. Tiles are then placed in rows, following a staggered pattern to optimize water drainage. Nails or fasteners secure each tile without over-tightening, preserving durability and minimizing the risk of cracking.
Ventilation should be incorporated to prevent heat buildup and moisture accumulation under the tiles. Special attention is needed for roof edges, ridges, and valleys, which are the most susceptible to leaks. After installation, inspect the roof for alignment, nail security, and proper flashing coverage. Finally, clean debris, check for loose tiles, and ensure water drains correctly. When installed carefully, a clay tile roof provides long-term protection, minimal maintenance, and an elegant, lasting design that enhances home value.
Roof Valleys and Edges
Valleys and edges are critical areas for preventing leaks. Open valleys use metal flashing to safely channel water, while shingles are trimmed and sealed along the edges for protection. Closed valleys rely on overlapping tiles to create a seamless appearance, requiring precise cutting. Roof edges are protected with drip edges and starter strips, preventing water from seeping under tiles and damaging the roof deck.
Proper installation of these areas ensures the roof remains waterproof, structurally sound, and aesthetically pleasing. Paying attention to valleys and edges not only prevents water infiltration but also extends the life of the roof. Regular inspection and maintenance of these areas help identify early signs of wear, keeping the roof functional and attractive for decades.
Common Moss Hazards
Moss growth on clay tiles is not only unsightly but can compromise roof performance. Understanding the hazards helps homeowners address issues promptly to maintain durability and aesthetic appeal.
Common Moss Hazards
Moss retains moisture against clay tiles, increasing the risk of rot and leaks. It can lift or curl tiles, reducing resistance to wind and water. Early removal prevents structural damage, ensures proper drainage, and preserves the roof’s integrity and long-term durability.
Aesthetic Concerns
Moss creates uneven roof surfaces, green patches, and streaks, diminishing curb appeal. Even without structural damage, moss can make the roof look poorly maintained. Regular cleaning helps maintain a visually appealing surface and preserves the property’s overall value, ensuring the roof complements the home’s exterior design.
Secondary Problems
Dead moss can trap moisture, promoting mold and fungi growth beneath tiles. This can compromise attic air quality, weaken wood structures, and increase maintenance issues. Prompt cleaning and preventive measures help maintain healthy ventilation, reduce potential damage, and prolong the life and effectiveness of the clay tile roof.
Handling Different Shingle Types
Clay tiles require unique installation techniques compared to other roofing materials. Asphalt shingles are laid in staggered patterns with 4–6 nails per shingle, while metal panels use seam tape and fasteners, avoiding overtightening. Wood shakes need vented sheathing and careful spacing to prevent warping. For clay tiles specifically, nails secure edges and mortar may be applied for added support. Proper alignment ensures effective water shedding and prevents slippage.
The roof’s structural assessment prior to installation guarantees safe weight support. Following manufacturer guidelines and best practices is essential for long-term durability. Proper flashing, ridge, and edge treatment, as well as ventilation planning, contribute to performance and longevity. Each type of roofing material has its own requirements, but clay tiles demand careful attention to weight, placement, and water management. By following these steps, homeowners ensure their roof remains functional, attractive, and low-maintenance for decades.
Maintenance Tips
Regular maintenance ensures clay tile roofs remain in peak condition. Cleaning moss, inspecting for broken tiles, and checking underlayment helps prevent costly repairs and extends roof life. A structured approach helps homeowners schedule inspections and address common issues efficiently.
| Maintenance Task | Frequency | Notes |
|---|---|---|
| Roof Inspection | Every 1–2 years | Check structure, underlayment, flashing |
| Tile Replacement | As needed | Replace cracked or broken tiles promptly |
| Moss and Algae Removal | Annually | Use eco-friendly cleaning methods |
| Flashing and Valleys | Every 2 years | Inspect for leaks or corrosion |
| Underlayment Check | Every 5 years | Replace if deteriorated |
FAQs
How long do clay tile roofs last?
Clay tile roofs can last between 50 and 100 years when properly maintained. Their durability, resistance to harsh weather, and low maintenance make them a long-term investment, providing consistent protection and preserving the home’s value over decades.
Can I walk on a clay tile roof?
Walking on a clay tile roof should be done with extreme caution. Only step on reinforced areas, wear proper footwear to prevent cracking or dislodging tiles, and avoid placing heavy weight directly on individual tiles to maintain roof integrity.
How do I prevent moss growth on clay tiles?
Moss growth can be prevented by installing copper or zinc strips along the roof ridge. Regular low-pressure cleaning removes existing moss, while proper roof ventilation and drainage reduce moisture, helping keep the tiles free from moss and algae buildup.
Do clay tiles require special underlayment?
Clay tiles require underlayment that provides a reliable waterproof barrier and supports the roof’s weight. It must work with flashing to prevent leaks and protect structural components, ensuring long-term performance, durability, and the overall effectiveness of the clay tile roof.
Final Thoughts
Tiling a roof with clay tiles combines aesthetic appeal, long-term durability, and functional protection. Proper planning, roof structure assessment, and attention to installation details are essential to maximize the benefits. Choosing the right tile profile and color enhances both design and performance, while careful underlayment installation and flashing prevent leaks and water damage.
Regular maintenance, including moss removal, tile replacement, and inspection of edges, valleys, and underlayment, ensures the roof remains functional and attractive for decades. Compliance with local building codes and professional oversight further safeguards safety and structural integrity. When installed and maintained correctly, a clay tile roof can serve as a long-lasting, visually stunning investment, protecting the home from weather extremes and adding value while requiring minimal intervention over its lifespan.